The secret to staying dry in the unpredictable UK hills isn’t a single expensive jacket, but a smart, layered moisture management system.
- Your ‘waterproof’ gear likely fails due to degraded water repellency (DWR), not a faulty membrane, causing it to ‘wet out’.
- True resilience comes from system redundancy: using pack liners with dry bags and waterproof socks with boots.
Recommendation: Stop chasing the highest waterproof rating and start building an integrated system that manages rain from the outside and sweat from the inside.
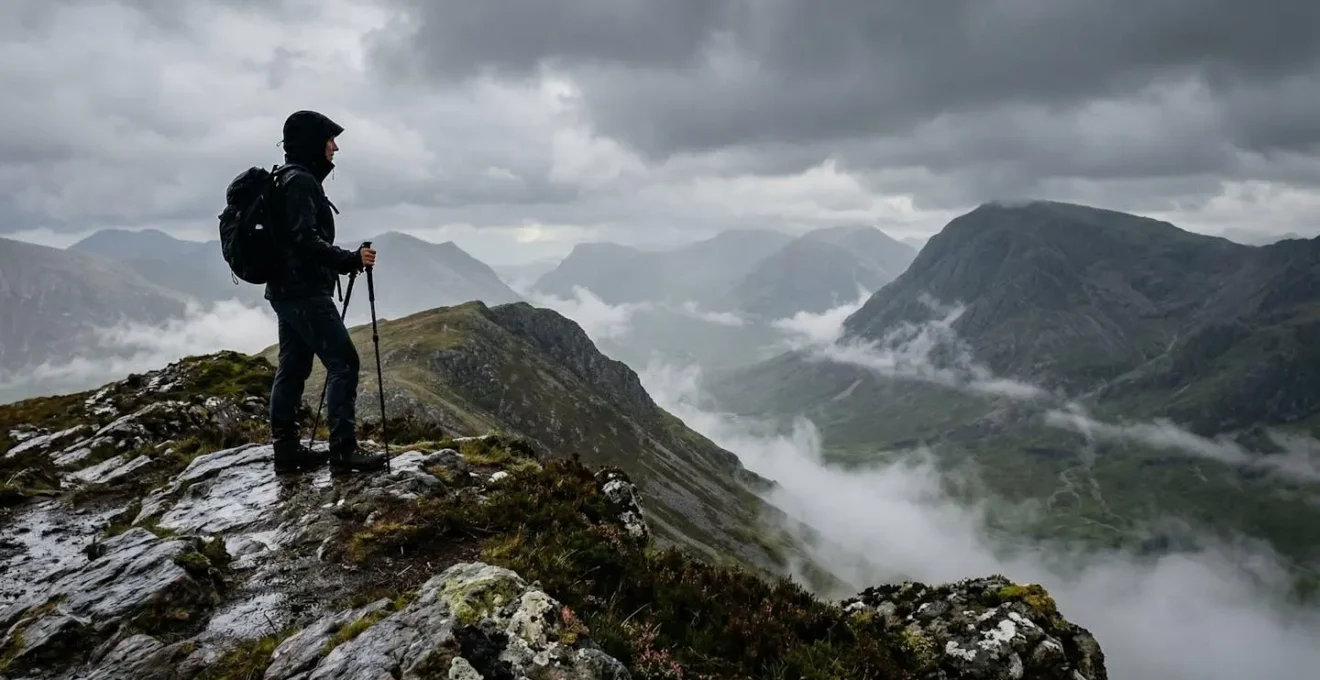
There’s a feeling every UK hiker knows intimately: the cold, damp seep of a so-called ‘waterproof’ jacket giving up the ghost halfway up a misty fell. You spent good money, you checked the labels, yet you’re still getting a soaking. The common advice is to layer up and spend a fortune on the latest Gore-Tex Pro shell, as if a single piece of gear could ever be a silver bullet against the sideways rain of the Peak District or a Cairngorms blizzard.
This approach is flawed. It focuses solely on keeping external water out while ignoring the enemy within: the sweat you generate on a strenuous ascent. True all-weather resilience isn’t found in a price tag or a brand name. It’s a philosophy, a practical, rugged system designed to manage moisture from both directions. It’s about understanding why gear fails and how to build in clever redundancies that create a personal microclimate, keeping you dry and comfortable whether you’re facing a Welsh downpour or a sunny spell in the Lakes.
But what if the key wasn’t spending more, but thinking smarter? What if a well-maintained £150 jacket and a £3 bin bag could outperform a £600 top-of-the-line shell on its own? This guide will deconstruct the myth of ‘100% waterproof’ and show you how to build a robust, field-tested gear system. We’ll cover everything from the science of leaky jackets and the simple tricks to revive them, to the packing strategy that guarantees a dry sleeping bag and the on-the-ground weather signs to heed before you even leave the car park.
To navigate this essential topic, we’ve broken down the key components of a truly weatherproof system. Explore the sections below to master each element and ensure your next adventure is remembered for the views, not the damp.
Summary: A Practical Guide to Weatherproof Gear for the UK Hills
- Why Your ‘Waterproof’ Jacket Leaks During Heavy Downpours?
- How to Reproof Your Gore-Tex Jacket in 5 Simple Steps?
- Hiking Boots vs Trail Runners: Which Is Best for the Muddy Cotswolds?
- The Packing Mistake That Ruins 80% of Camping Trips in Wales
- When to Plan Your Summit Attempt: The 3 Weather Signals to Watch
- Why Your ‘Easy Run’ Is Too Fast According to Your Watch?
- The Boots Mistake That Leads to Wet Socks in October
- How to Choose a Couple’s Hobby That You Both Actually Enjoy?
Why Your ‘Waterproof’ Jacket Leaks During Heavy Downpours?
That clammy, damp feeling you get inside your jacket during a downpour usually isn’t the jacket’s waterproof membrane failing. The real culprit is a phenomenon called ‘wetting out’. Your jacket has two lines of defence: the inner waterproof membrane (like Gore-Tex or an equivalent) and an outer Durable Water Repellent (DWR) coating. DWR is what makes water bead up and roll off the surface. When it degrades from dirt, abrasion, and body oils, the outer fabric becomes saturated. While you’re not technically getting wet from rain, the saturated fabric feels cold, heavy, and clings to your skin, making you feel damp. Crucially, a wetted-out fabric can’t breathe, trapping your sweat and making you wet from the inside.
This is where many people make a costly mistake. Thinking their jacket has failed, they rush to buy a new one with a higher ‘hydrostatic head’ (HH) rating—the measure of water pressure a fabric can withstand. While a higher number means more waterproof, the benefits diminish rapidly. For most UK conditions, from drizzle to persistent rain, you don’t need a fortress. In fact, fabrics rated between 5,000mm-10,000mm handle average to heavy rainfall for hours. Anything above that is often overkill for weekend hiking and won’t prevent the dreaded ‘wetting out’ if your DWR isn’t maintained.
Understanding this distinction is the first step to saving money and staying drier. It’s not about the initial waterproof rating as much as it is about maintaining that first line of defence—the DWR—to ensure your jacket can breathe effectively and shed water as designed.
How to Reproof Your Gore-Tex Jacket in 5 Simple Steps?
Now that you know DWR failure is the primary cause of that ‘leaky’ feeling, the good news is that restoring it is simple and cheap. Before you even think about buying a new spray-on or wash-in proofer, you should try to reactivate the factory-applied treatment. Over time, dirt and oils mask the DWR, but the treatment itself is often still present on the fabric. A thorough cleaning is the first and most important step. Wash your garment according to the manufacturer’s instructions, using a technical wash product rather than standard detergent, which can leave residues that attract water.
Once clean, the magic step is applying heat. You don’t always need a specific reproofing product straight away. According to Gore-Tex’s official care instructions, simply tumble drying for 20 minutes on a low-to-medium heat can be enough to reactivate the existing DWR treatment. If you don’t have a tumble dryer, a warm iron on a gentle setting (with a towel between the iron and the jacket, and no steam) achieves the same result. You can test your success by flicking a few drops of water onto the fabric; if they bead up and roll off, your DWR is working.
If washing and heating doesn’t restore the beading, it’s time for a reproofing product. These come in two main types: spray-on and wash-in. For two or three-layer jackets (like most Gore-Tex shells), a spray-on proofer is superior. It allows you to target the outer fabric only, preserving the breathability of the inner wicking liner. After applying the spray evenly to the clean, damp jacket, you again need to apply heat via a tumble dryer or iron to activate the new DWR coating. This simple maintenance can make an old jacket perform like new, saving you hundreds of pounds.
Hiking Boots vs Trail Runners: Which Is Best for the Muddy Cotswolds?
The classic image of a hiker involves a pair of sturdy, high-ankled leather boots. For decades, they’ve been the default choice for their ankle support and waterproofness. But in the often boggy, undulating terrain of places like the Cotswolds or the South Downs, they can be overkill, leading to fatigue. There’s a well-known piece of wisdom in the hiking community, perfectly articulated by an expert from the HikingGuy blog:
A pound on your feet is like five on your back
– HikingGuy, Best Hiking Gear 2026 Guide
This principle of effort economy is why many experienced UK hikers are switching to lighter trail running shoes. They are more flexible, require less energy to lift with every step, and often have better grip on slick mud and rock. The obvious drawback is that they are typically less waterproof and lower-cut, making them vulnerable to puddles and wet grass. This is where the ‘system’ approach comes in. Instead of relying solely on your footwear, you can create a redundant waterproof barrier with a pair of waterproof socks. Modern waterproof socks use a three-layer system with a breathable membrane that keeps your feet completely dry from external moisture while allowing sweat to escape. This means you can have the lightweight, agile benefits of a trail runner without the penalty of soaked feet after the first boggy patch.
So, for a muddy day in the Cotswolds, a combination of fast-draining trail runners and waterproof socks often provides a more comfortable and less fatiguing solution than heavy, traditional boots. The boots still have their place, especially in technical, rocky terrain in the Highlands or for winter conditions where insulation and crampon compatibility are key. But for the majority of UK three-season hiking, thinking lighter on your feet is a smarter strategy.
The Packing Mistake That Ruins 80% of Camping Trips in Wales
The single biggest mistake that leads to a miserable, wet camping trip isn’t forgetting your waterproof jacket; it’s assuming a backpack rain cover is enough to protect your gear. Rain covers are notoriously unreliable in windy British weather. They can be blown off, and they don’t protect the part of the pack against your back, where water can run down and soak through. This is a critical failure, especially when you’re carrying vital insulation like a sleeping bag, as REI’s expert advice warns that standard down loses much of its insulating ability if it gets wet. A wet sleeping bag in the Welsh mountains can be a trip-ender, or worse, a genuine safety risk.
The solution is a triple-redundancy waterproofing system for your pack. It’s a belt-and-braces approach that guarantees your critical gear stays bone dry, no matter the deluge. Think of it as three independent lines of defence:
- First Line (External): The pack rain cover. It’s your first shield against the rain, but also your least reliable. Use it, but never trust it completely.
- Second Line (Internal Barrier): A heavy-duty pack liner. This is the most important element. You don’t need to buy a specific one; a strong rubble sack or even a thick bin bag from a DIY store works perfectly. It forms a single, large waterproof barrier inside your entire pack.
- Third Line (Compartmentalisation): Lightweight dry sacks. Use these for your most vulnerable gear: your sleeping bag, spare clothes, and electronics. This compartmentalises your protection. Even if your main pack liner were to fail, your essential survival gear remains protected.
This layered system may seem like overkill, but the first time you open your pack in a downpour to find your sleeping bag perfectly dry and lofty, you’ll understand its value. It’s a simple, cheap, and effective strategy that transforms your backpack from a water-resistant carrier into a fully waterproof vessel.
When to Plan Your Summit Attempt: The 3 Weather Signals to Watch
In the UK, and especially in mountainous regions like the Scottish Highlands or Snowdonia, the weather forecast you see on the TV or a standard phone app is dangerously inadequate. As any seasoned walker knows, Scottish weather is renowned for offering up four seasons in one day. Your gear system is only one part of the equation; knowing when to push for the summit and when to turn back is a critical skill. Before any mountain day, you must consult a dedicated mountain-specific forecast like the Mountain Weather Information Service (MWIS). It provides crucial details that standard forecasts omit, primarily the freezing level, cloud base height, and wind speed at different elevations.
There are three key signals to watch for in these forecasts:
- Cloud Base vs. Summit Height: If the forecast cloud base is lower than the summit of your target mountain (e.g., cloud at 800m for a 950m summit), you need to be prepared for navigation in zero visibility. This means having a map, a compass, and knowing how to use them, regardless of what your GPS says.
- Wind Speed and Direction: The wind speed you feel in the valley is a fraction of what it will be on an exposed ridge. Understanding its impact is crucial for safety. Headwinds will drain your energy, but crosswinds on a narrow ridge are the real danger.
- The ‘Freezing Level’: This tells you at what altitude rain will turn to snow and ice. In spring and autumn, it can fluctuate dramatically. Crossing a benign-looking patch of old snow can be treacherous without the right equipment (ice axe and crampons) if it has frozen overnight.
The wind, in particular, requires careful consideration. Its effect changes dramatically based on its direction relative to you, as this breakdown shows.
| Wind Direction | Speed Tolerance | Risk Level | Tactical Response |
|---|---|---|---|
| Tailwind | Up to 40mph manageable | Low-Medium | Can assist progress but watch for gusts |
| Headwind | 25mph becomes difficult | Medium | Significantly slows progress, increases fatigue |
| Crosswind on ridge | 20mph dangerous | High | Risk of being blown off balance on exposed sections |
Reading the weather is a skill that develops with experience, but starting with the right information from a source like MWIS is the first and most important step to making safe decisions in the mountains.
Why Your ‘Easy Run’ Is Too Fast According to Your Watch?
While the title might seem focused on running, the principle applies directly to hiking: why does your ‘easy’ walk up a hill sometimes feel like a gruelling slog, leaving you exhausted? Often, the answer lies in hidden factors within your gear system that sabotage your ‘effort economy’. Your body is a furnace, and on a strenuous walk, it generates a huge amount of heat and sweat. If your gear system doesn’t allow this moisture and heat to escape, you begin to overheat. Your body then has to spend precious energy trying to cool itself down, energy that should be going towards moving you up the mountain. This is a primary reason an ‘easy’ day can feel disproportionately hard.
Several gear choices can secretly drain your energy reserves. A poorly designed backpack that sits flat against your back can create a pool of sweat, while modern packs with ‘trampoline’ style mesh backs create an air gap that dramatically improves ventilation and reduces overheating. This isn’t just about comfort; it’s about energy conservation. The same applies to your clothing. A jacket that has ‘wetted out’ not only feels cold but has also lost all its breathability, effectively turning it into a plastic bag that traps all your body heat and moisture.
Before your next hike, it’s worth auditing your gear for these hidden energy drains. A few small tweaks can make a massive difference to your endurance and enjoyment on the trail.
Your Action Plan: Pinpoint Hidden Effort Drains in Your Gear
- Fabric Saturation: Check your waterproofs. Is water beading or soaking in? A ‘wetted out’ jacket is heavy, non-breathable, and a major energy drain. It’s time to clean and reproof it.
- Breathability Audit: Inventory your layers. Are you using non-breathable items like a cheap poncho or cotton t-shirts? These trap sweat, causing you to overheat and then get cold. Switch to a wicking base layer and breathable mid-layers.
- Backpack Fit & Design: Does your pack sit flush against your back? If you regularly suffer from a sweaty back, consider a pack with a ventilated or ‘trampoline’ back system to improve airflow and reduce energy loss from overheating.
- Footwear Weight: Weigh your boots. If they are heavy leather models and you’re mostly doing trail walking, consider switching to lighter trail runners or fabric boots. Remember, weight on your feet costs exponentially more energy than weight on your back.
- Moisture Management: Are you reacting to the weather? Be proactive in managing your layers. Vent your jacket zips before you start sweating heavily on an ascent, and put a layer back on before you get cold on a break.
The Boots Mistake That Leads to Wet Socks in October
It’s a frustratingly common scenario during the UK’s wetter months. You’ve invested in a good pair of waterproof boots, yet you end the day with damp or soaking socks. Your immediate thought is that the boots have failed or are leaking. While that’s possible, the far more likely culprit, especially in autumn and winter, is water coming in over the top of the boot. When you’re trudging through long, wet grass, splashing through deep puddles, or navigating boggy terrain, water simply runs down your leg or splashes up over the cuff of your boot.
No matter how waterproof the boot itself is, it can’t protect you from water ingress from above. This is a classic failure of viewing gear in isolation rather than as a system. The solution is simple and has been used by seasoned walkers and mountaineers for decades: gaiters. These fabric sleeves create a protective sheath that covers the gap between the top of your boot and the bottom of your trousers.
Since you looked at high-top footwear, gaiters will just be an extra layer that helps your socks and feet stay dry. Gaiters also prevent your pants from absorbing all the water you flick up as you go puddle-jumping
– The Pedal Project, 15 Hiking Rain Gear Essentials for Spring Adventures
Gaiters effectively extend the height of your boots, allowing you to wade through shallow streams or stride through deep, boggy patches with confidence. They stop water from running down your waterproof trousers and into your socks, and they prevent mud and grit from getting into your boots, which can cause abrasion and discomfort. In October, when the trails are saturated and every patch of grass holds a gallon of water, a pair of gaiters is one of the most effective, low-cost additions you can make to your waterproof system.
Key Takeaways
- True weatherproofing is a moisture management system, handling both external rain and internal sweat, not just one expensive item.
- The primary failure point of waterproof jackets is degraded Durable Water Repellent (DWR), which is easily restored through cleaning and heat.
- Redundancy is your best friend: use a pack liner AND dry bags for your pack, and consider waterproof socks WITH trail runners for your feet.
How to Choose a Couple’s Hobby That You Both Actually Enjoy?
Taking up hiking as a couple’s hobby sounds idyllic, but it can quickly become a source of friction if approached with the wrong mindset and gear strategy. Disagreements over pace (‘you’re going too fast!’) or comfort (‘I’m freezing, you’re boiling!’) are common. Applying the same ‘system’ philosophy we’ve used for solo gear to a shared adventure can transform the experience, ensuring it’s enjoyable for both partners.
The key is to move away from simply duplicating gear and instead build a flexible, shared system that caters to individual needs and balances the effort. For instance, instead of two identical layering systems, focus on flexible ones where each person can independently manage their own microclimate by adding or removing a fleece or venting a jacket. The faster or stronger partner can carry slightly heavier shared items—like the tent, stove, or the bulk of the food—which naturally helps to even out the pace on the trail. This turns a potential point of conflict into a cooperative strategy.
Investing in one or two high-quality, lightweight pieces of shared gear can also be more effective than buying two cheaper, heavier versions. A single, ultralight 62-liter backpack that’s lighter than most day packs can carry all the shared items comfortably, making a huge difference to the overall enjoyment. This strategic approach to gear turns hiking from a test of endurance into a truly shared and enjoyable hobby.
- Create flexible layering systems: Ensure each partner can manage their own temperature independently. This is the number one rule for preventing arguments about being too hot or too cold.
- Balance the load: The faster partner should carry more of the shared weight. This is a practical and effective way to naturally sync your walking pace.
- Invest in key shared items: Prioritise a lightweight tent and a good cooking system that can be shared. This saves both weight and money compared to duplicating everything.
- Implement the ‘Buy One, Rent One’ strategy: For expensive, less-frequently used items like a four-season tent, consider buying one high-quality item and renting a second when needed for separate trips.
The principles outlined here—from DWR maintenance to triple-redundancy packing—are not just tips; they are the building blocks of a resilient outdoor system. The next logical step is to stop thinking about individual items and start auditing your entire gear closet as an integrated whole. Begin today by laying out your kit and identifying the weak points, not to spend more money, but to build a smarter, more reliable system for your next adventure in the hills.